|
Construction Line: CLINE |
|
|
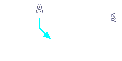
( Toolbar: Construction Line Ribbon: Draw > Construction Line (in Draw) Menu: Draw > Construction Line Keyboard: _CLINE Draws a construction line. A construction line is a special type of infinite line that is typically used when quick drafting techniques are required, for example, to make projections of front and side views. Similar to an infinite line, a construction line is a line through a given point, oriented at a specified angle in three-dimensional space and extending to infinity in both directions. Because construction lines extend to infinity, they are not calculated as part of the drawing extents. Construction lines are drawn automatically on their own layer, which by default is named CLINE. This makes it easy to change the appearance of construction lines; simply change the properties of the layer such as its color, transparency, etc. Additionally, you can specify a different layer for locating construction lines using the CLINELAYER system variable. Construction lines are drawn to match the current UCS. Construction line: Bisect/Horizontal/BOth/Vertical/Angle/Offset/Match/Erase/Clear/<Point along Line>: To start drawing a construction line using the default method, specify the point through which you want the construction line to pass. To draw a construction line that bisects a point or entity, select Bisect. To draw a construction line in a horizontal direction, choose Horizontal. To draw a construction line in both the horizontal and vertical directions, choose BOth. To draw a construction line in a vertical direction, choose Vertical. To draw a construction line by specifying its angle, choose Angle. To draw a construction line parallel to an existing entity, choose Offset. To draw a construction line on top of an existing entity, choose Match. To delete a construction line, choose Erase. To delete all construction lines in the drawing, choose Clear. To draw a construction line by specifying a basepoint
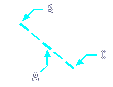
Construction line: Bisect/Horizontal/BOth/Vertical/Angle/Offset/Match/Erase/Clear/<Point along Line>: Select the point along the construction line. Direction: Specify the direction of the construction line. Direction: Continue specifying directions to draw an array of construction lines, or press Enter when done. To draw a construction line by bisecting a point
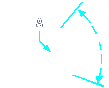
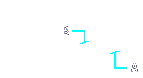
Choose Bisect. Entity/Two entities/<Vertex point>: Specify the vertex point through which you want the construction line to pass. Bisection angle start point: Specify the start of the angle. Bisection angle endpoint: Specify the end of the angle To draw a construction line by bisecting a line, arc, or polyline segmentChoose Bisect. Entity/Two entities/<Vertex point>: Choose Entity or Two entities. Select line, arc, or polyline segment to bisect: Select the entity you want to bisect. Select line, arc, or polyline segment to bisect: Select the second entity you want to bisect. (Displays if you chose to bisect two entities.) To draw a horizontal construction line along the x-axis
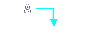
Choose Horizontal. Auto/<Location>: Specify a point through which the horizontal construction line passes. Auto/<Location>: Specify the point for a second horizontal construction line. You can continue to draw horizontal construction lines by selecting the point through which the construction line passes. To stop drawing construction lines, right-click the mouse or press Enter. To draw construction lines along both the x- and y-axisChoose BOth. Auto/<Location>: Specify a point through which the horizontal and vertical construction line passes. Auto/<Location>: Specify the point for a second horizontal and vertical construction line. You can continue to draw similar construction lines by selecting the point through which the construction line passes. To stop drawing construction lines, right-click the mouse or press Enter. To draw a vertical construction line along the y-axis

Choose Vertical. Auto/<Location>: Specify a point through which the vertical construction line passes. Auto/<Location>: Specify the point for a second vertical construction line. You can continue to draw vertical construction lines by selecting the point through which the construction line passes. To stop drawing construction lines, right-click the mouse or press Enter. To draw a construction line by specifying its angle
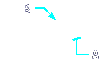
Choose Angle. Reference · <Enter angle (0°)>: To accept the current setting for the angle, press Enter, or enter a new value. To specify an entity to use as the reference point, choose Reference. Location: Specify a point through which the construction line passes. Location: Specify the point for a second construction line. You can continue to draw construction lines by selecting the point through which the construction line passes. To stop drawing construction lines, right-click the mouse or press Enter. To draw a construction line using an entity as the reference point for the angle

Choose Reference. Select reference entity: Specify the entity you want to use as a reference point for the angle. Enter angle: Enter the angle from the reference point. To draw a construction line that parallels another entity and specify an offset distance
Choose Offset. Through point/<Offset distance for parallel construction line> (2.5000): To accept the current setting for the distance you want the construction line drawn from an entity, press Enter, or enter a new value. Select entity for parallel construction line: Select the entity that you want the construction line to parallel. Side for parallel construction line: Select the side of the entity where you want to draw the construction line. To draw a construction line that parallels another entity and specify a through point
Choose Offset. Through point/<Offset distance for parallel construction line> (2.5000): Choose Through point. Select entity for parallel construction line: Select the entity that you want the construction line to parallel. Through the point: Specify the point through which you want the construction line to pass. To draw a construction line on top of an existing entityChoose Match. Select entity for parallel construction line: Select the entity that you want the construction line to match. To delete one or more construction linesChoose Erase. FILter/<Select entities>: Select the construction lines you want to delete. You can also choose FILter to filter the selection by properties. When you are done selecting construction lines to delete, press Enter. To delete all construction lines in the drawingChoose Clear. Tell me about...How do I...
|

|
 )
)
© Copyright 2023. Back2CAD Technologies LLC. All rights reserved. Kazmierczak® is a registered trademark of Kazmierczak Software GmbH. Print2CAD, CADdirect, CAD.direct, CAD Direct, CAD.bot, CAD Bot, are Trademarks of BackToCAD Technologies LLC. DWG is the name of Autodesk’s proprietary file format and technology used in AutoCAD® software and related products. Autodesk, the Autodesk logo, AutoCAD, DWG are registered trademarks or trademarks of Autodesk, Inc. All other brand names, product names, or trademarks belong to their respective holders. This website is independent of Autodesk, Inc., and is not authorized by, endorsed by, sponsored by, affiliated with, or otherwise approved by Autodesk, Inc. The material and software have been placed on this Internet site under the authority of the copyright owner for the sole purpose of viewing of the materials by users of this site. Users, press or journalists are not authorized to reproduce any of the materials in any form or by any means, electronic or mechanical, including data storage and retrieval systems, recording, printing or photocopying.
|